

It's been a while since my last tutorial so let’s jump back in. This time I’m going to focus on focus.
What is Focus?
The key point with focus is that the image plane/focal point of a telescope will match the focal length of that scope. If you add a focal reducer (field flattener) to the scope you reduce the focal length and therefore reduce the focal point.
Position a camera sensor at the focal point correctly and everything in the image will be crisp and well defined. Miss this point and it will be blurry.
Back Focus vs. Focus
Focus can be pretty confusing depending on who you talk to as the terms are overloaded. At a high level these consist of:
- Back focus
- Focus
Back Focus
Back focus normally refers to the fixed spacing required behind a reducer. If there’s no reducer in the setup then it’s somewhat irrelevant.
A reducer has one of more glass lenses within it which will distort the light that passes through it, reducing the focal point of that light, thus the name. As such, the manufacturer will include details on how much back focus (spacing) is required from the reducer to the cameras sensor to match the focal point.
For my telescope and reducer, we can refer to the manufacturers diagram below which serves as a nice example.
When configured correctly, from the back of the reducer you’ll notice that 55mm of back focus (spacing) is required before the camera sensor. Pretty simple.
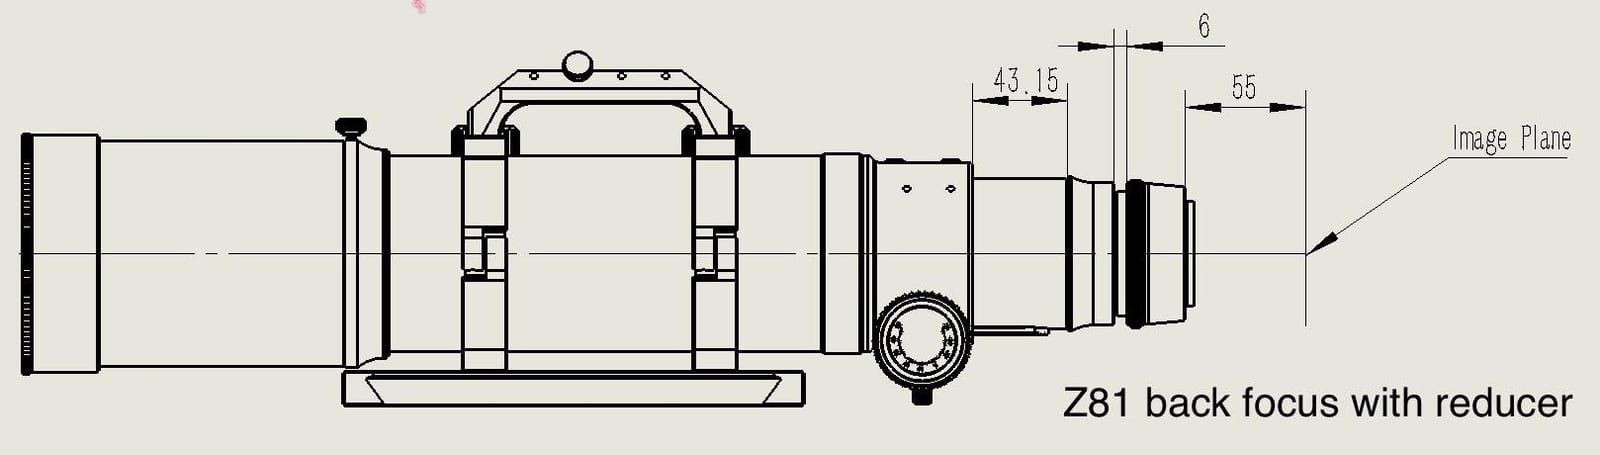
The next question is how do you satisfy that 55mm spacing? The answer is also simple, spacer rings. Use a combination of them that adds up to 55mm and connect the reducer to the camera using them.
Focus
Focus on the other hand, tends to refer to the variable distance behind the telescope to the camera sensor.
To find the point of focus where the camera sensor sits exactly at the focal point of the telescope requires some fine tuning. To achieve this telescopes have a focuser knob, and some have multiple to assist with precise adjustments.
These provide the ability to slide the camera back and forth a little, allowing for precision adjustment until the focal point is matched up nicely so that stars appear crisp and round, galaxies reveal their detail.
Again, let’s look at the diagram the manufacturer of my telescope includes for a setup without a reducer in play.
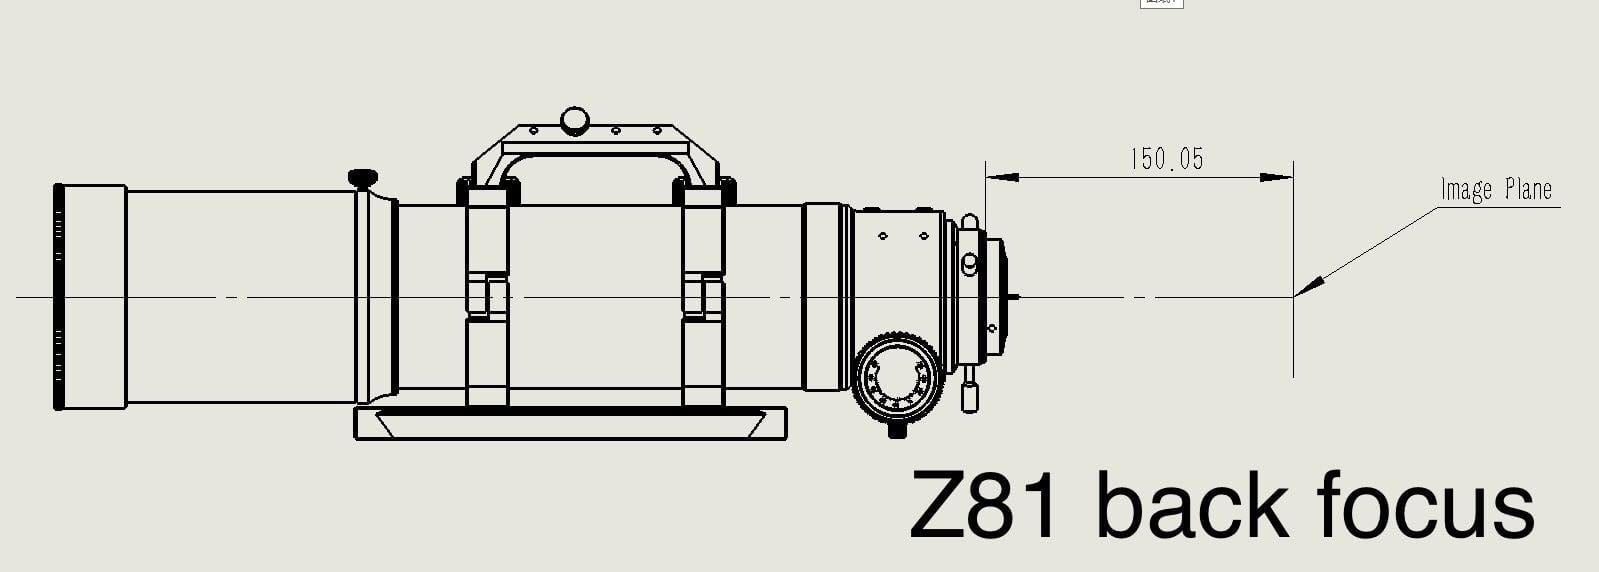
Here we see that with the focuser tube fully wound in 150.05mm of spacing is required. To satisfy this a combination of spacer rings would be needed to get within a short distance of the 150.05mm. The rest can be achieved using the focuser itself to make the small adjustments required to match it precisely.
How to Achieve Focus
Approaches used to figure out when you’ve got your telescope focused correctly vary a lot and there’s really no right or wrong provided the approach works sufficiently well that a crisp, clear image can be achieved.
In this section I’ll briefly cover several of the approaches I’ve used over the last few years.
One option is to do it by eye, checking the stars are small and crisp. This is probably the most error prone approach as it involve manually adjusting the focuser knob little by little, checking when the stars in the image look the crispest.
Another option is to make use of a Bhatinov mask, taking images of stars and adjusting focus until the central spike is aligned correctly in the diffraction pattern. Fortunately, my telescope, along with other William Optics telescopes, come with a Bhatinov mask built in to the cover.
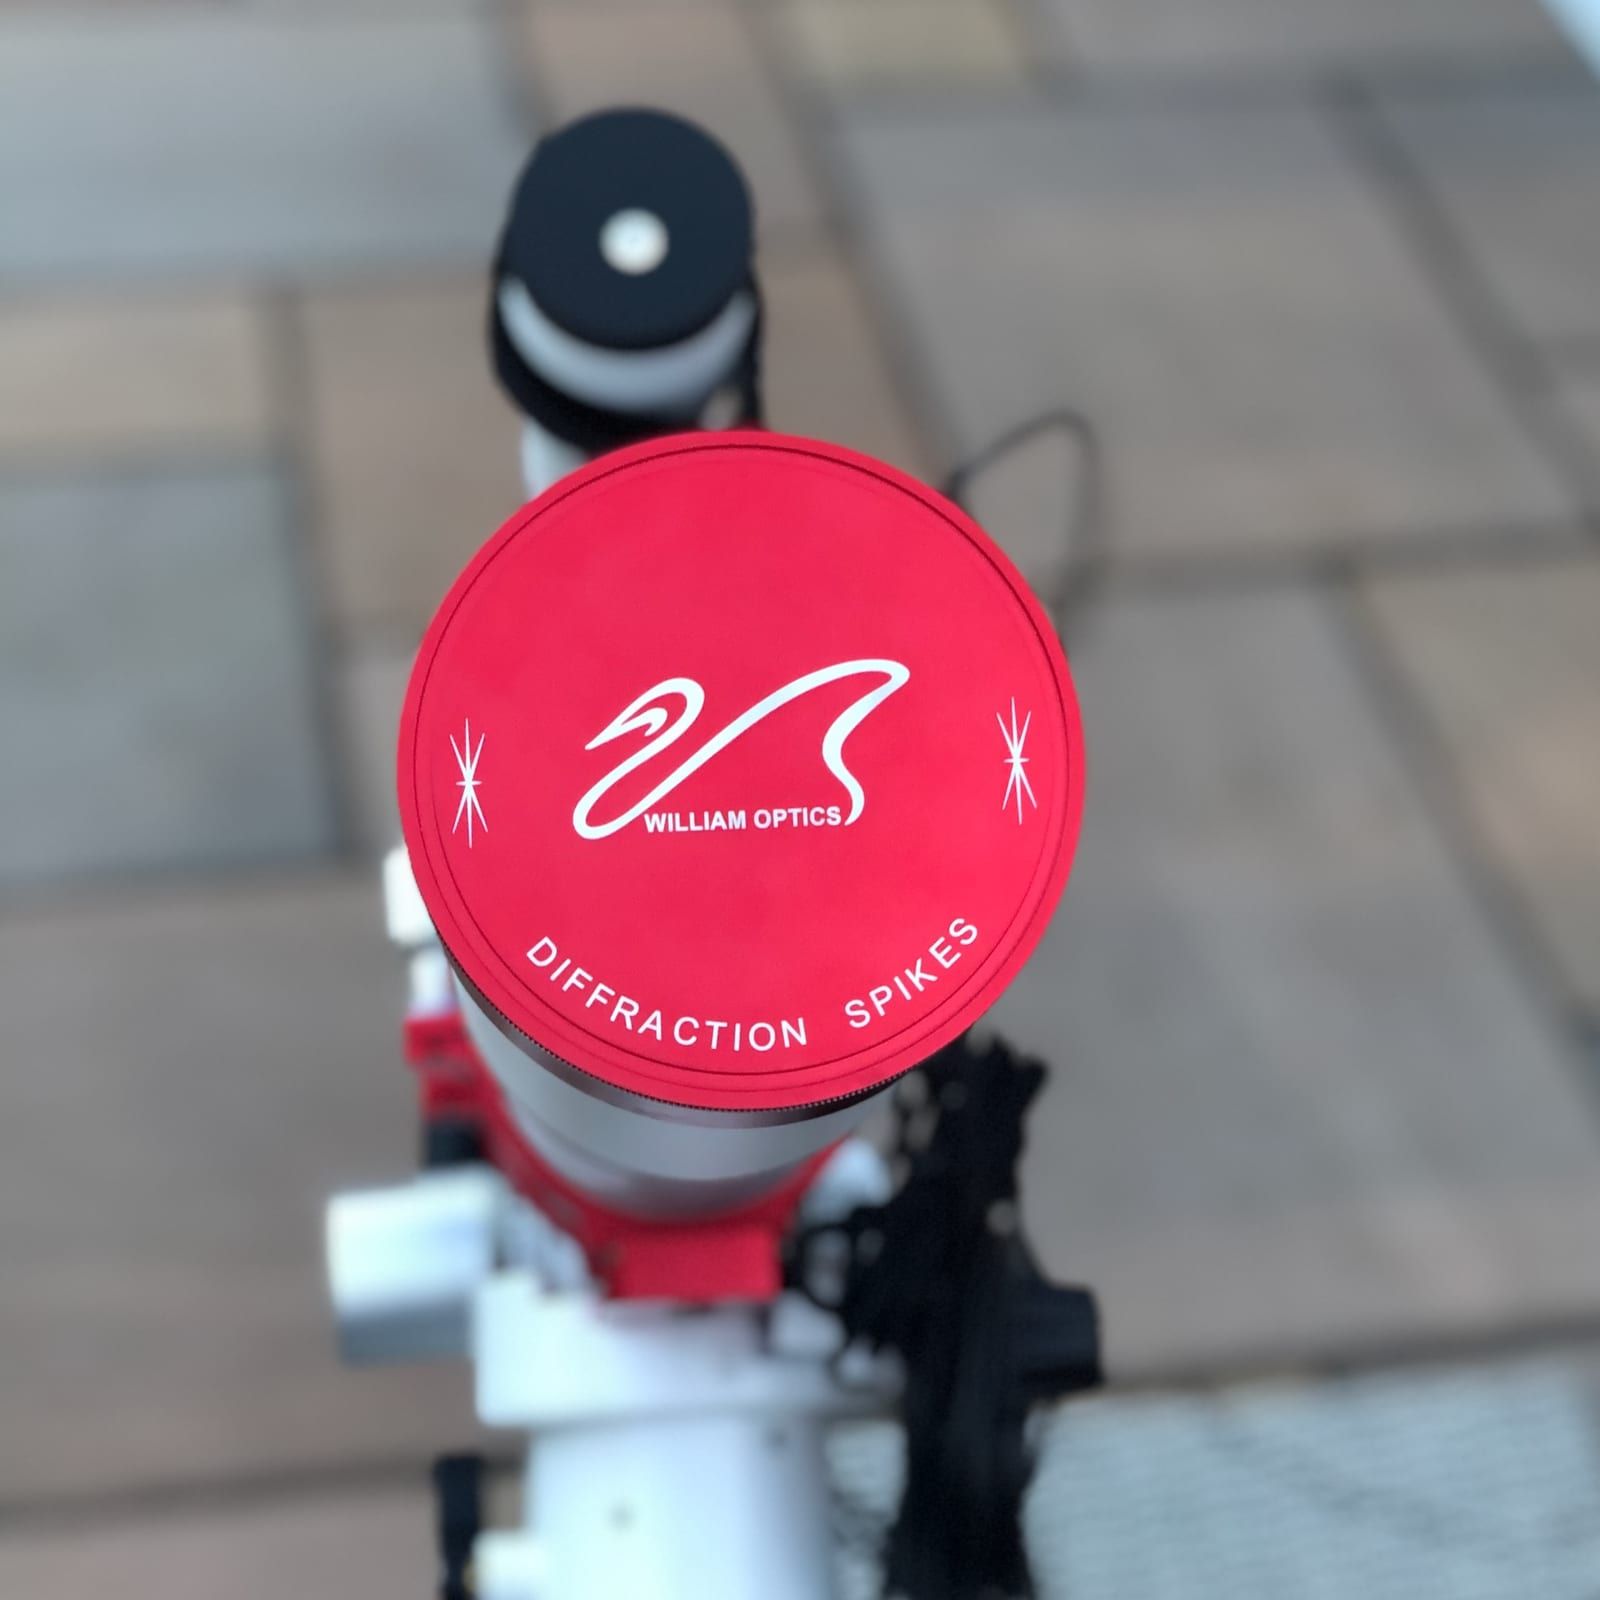
As an approach for focusing, I find using a Bhatinov mask a very simple and effective solution. An added bonus is that picking one up is relatively cheap and if you have a 3D printer (yes, I know it’s unlikely) you can even make one yourself.
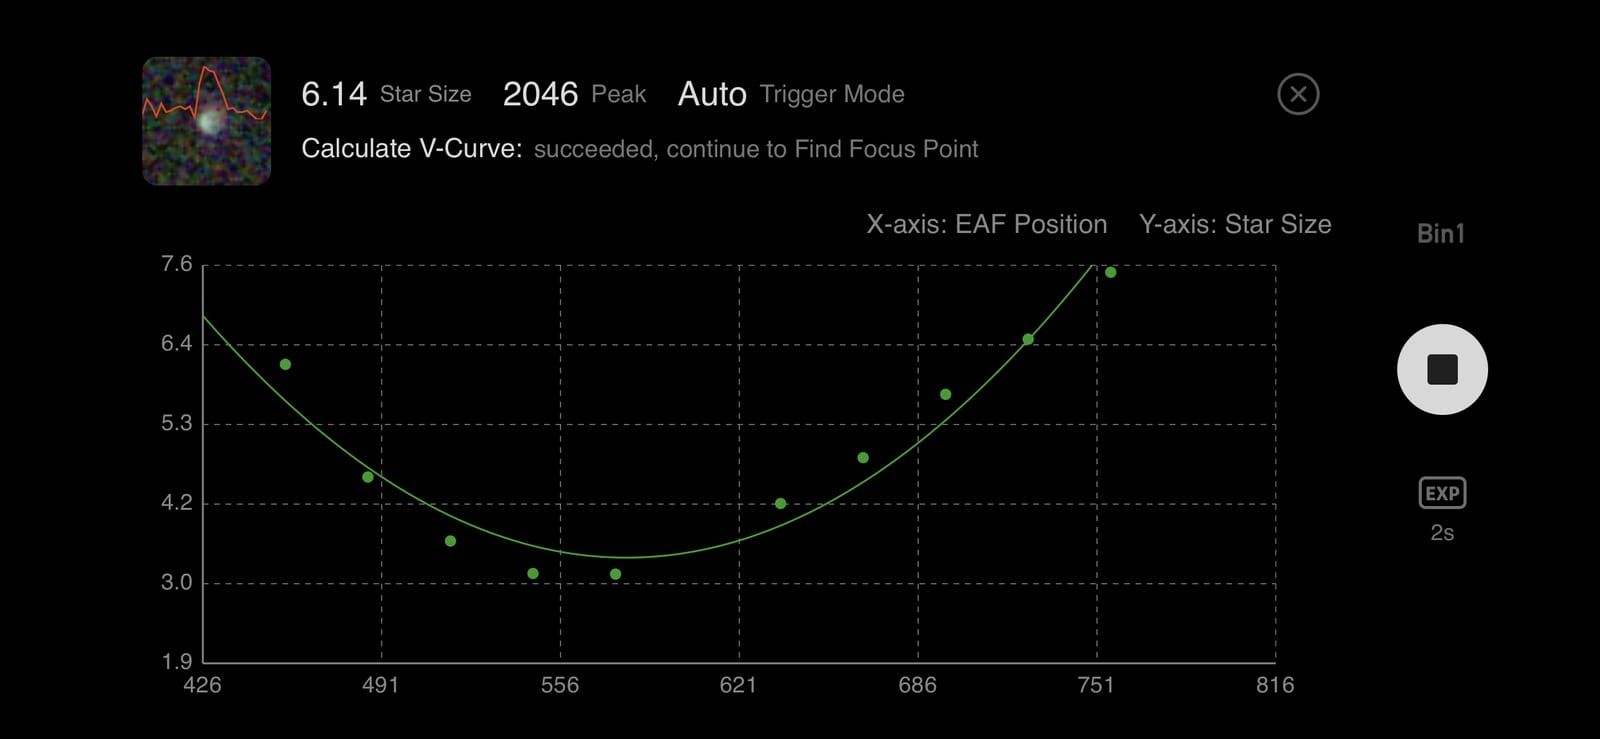
At present I use a ZWO EAF (Electronic Auto Focuser) which I fitted to my telescope. This repeatedly takes images, adjusting the focus a little each time. Using that data, it plots a graph based on the magnitude of a star chosen by the algorithm and looks for the point it’s at its smallest (i.e. the bottom of the curve). It repeats this sequence a couple of times to hone in on a good focuser setting.
I have no doubt there are many other approaches beyond these that I’ve listed. It’s a broad topic and there’s a lot to explore. Hopefully this gives an insight into focus and helps in some way.